PRE-ADVERSE ACTION PROCESS
The compliance agent will receive a ticket in Freshdesk with the title “Pre-Adverse Notice - Partner Name - Turn ID”
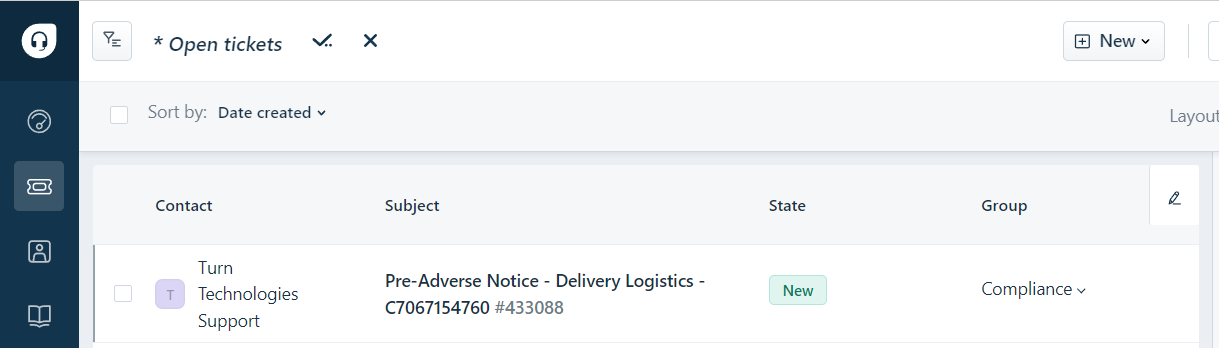
In order to send the Pre-Adverse Action letter, the Compliance Agent will do the following:
Open the ticket and click on the Turn Admin link
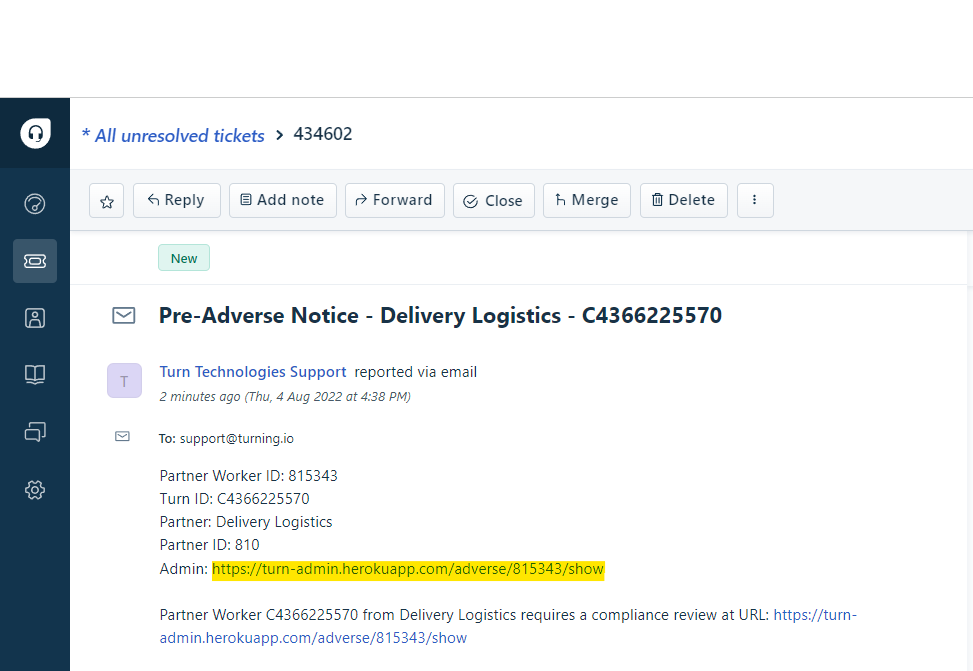
In Turn Admin is necessary to verify the next information:
That the Profile Status is: pending_first_ notice
That the Adverse Status is: pending_first_notice
Zip Code, City, and State are shown
We have the reject reason
IMPORTANT: If the applicant resides in Los Angeles or New York City, please assign the ticket to Jimena specifying the city in the ticket notes.
The above applies ONLY for CRIMINAL records. If the rejection reason is due to an MVR hits Compliance agent should proceed by sending the PAA letter.
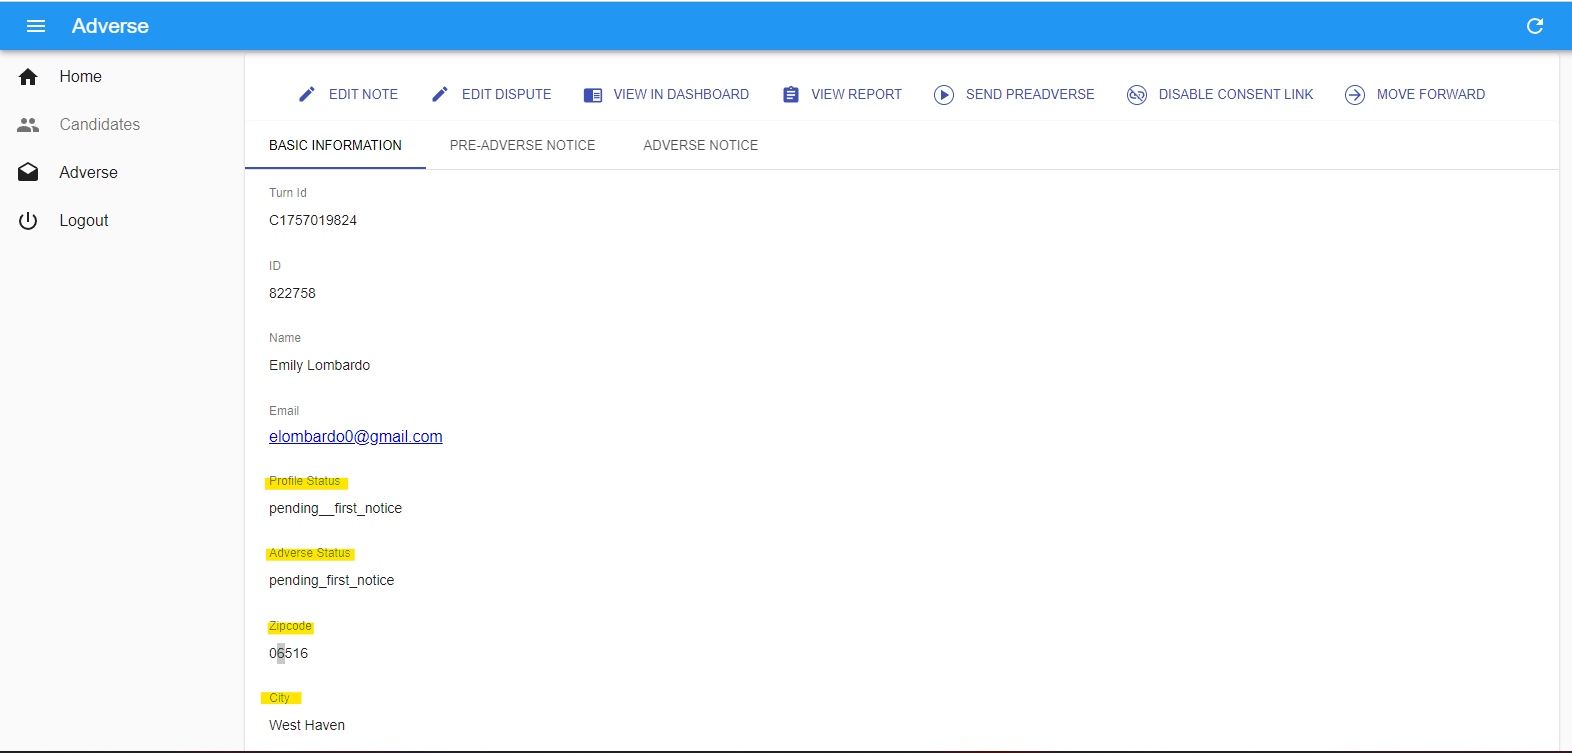
Click on “Pre- Adverse Notice”
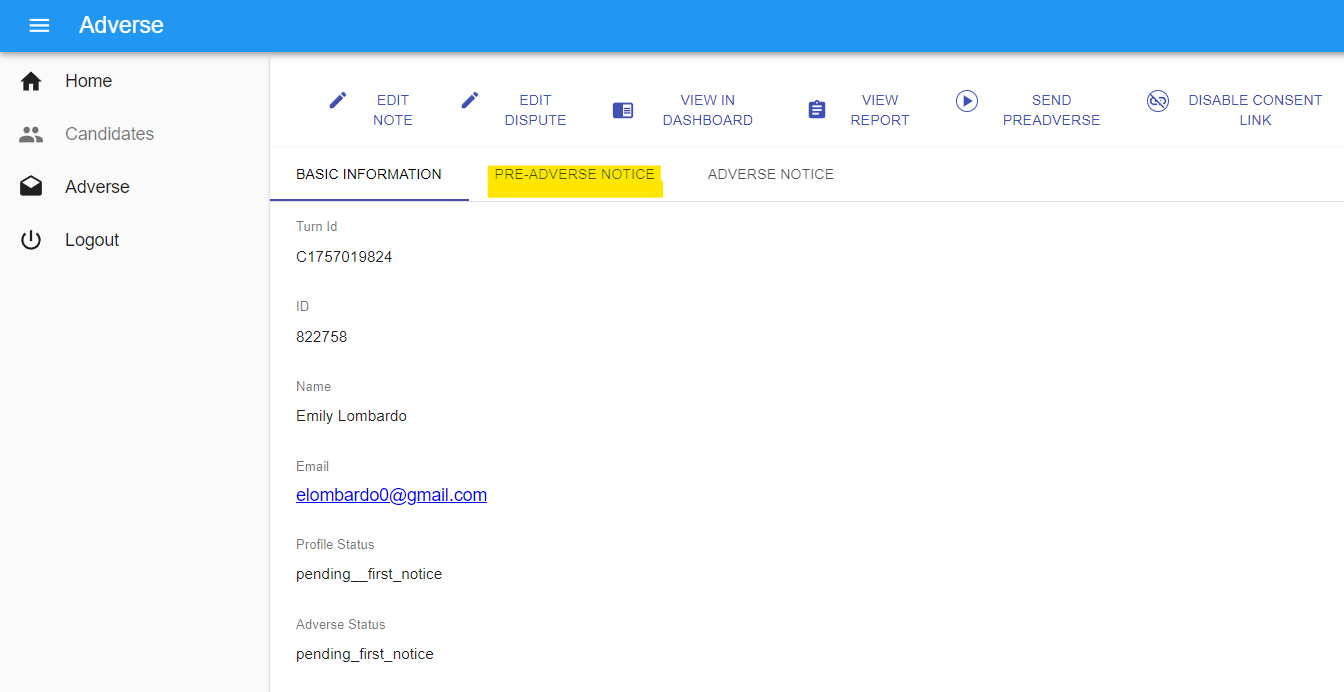
*NOTAS MUY IMPORTANTES:
The compliance agent will always review that the information is correct and includes all the attachments.
Also will review that the rejection reason is correct, if not, it’s necessary to do the following:
- Click on “edit note”
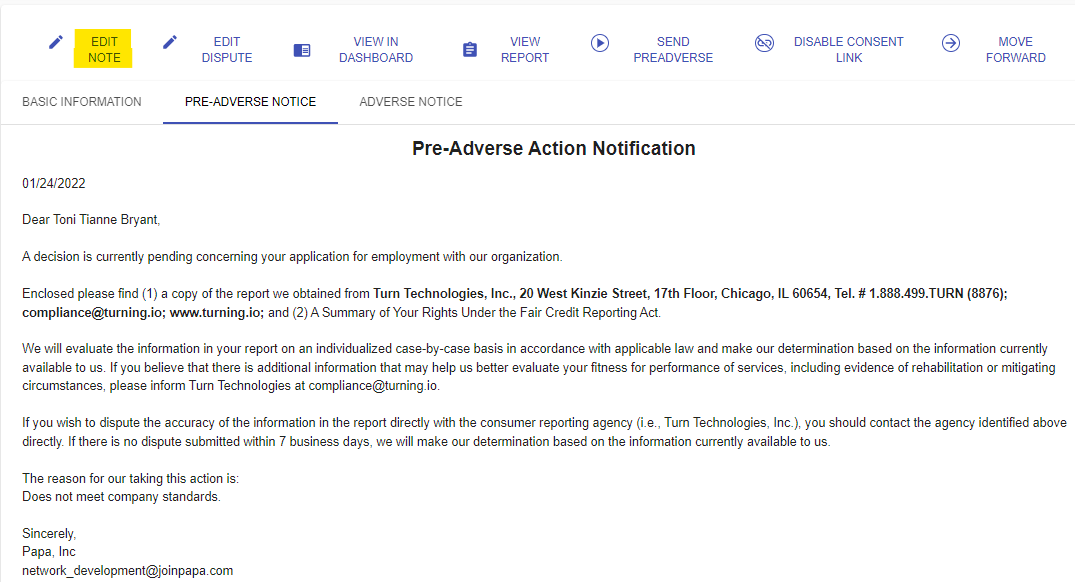
- Insert the reject reason, if we don’t have it, insert “Does not meet company standards.” (ESTO NO APLICA PARA EL PARTNER RINSE - MVR ONLY)

Click on “Save”. Make sure the rejected reason is saved correctly.
Finally, click on “Send Preadverse”
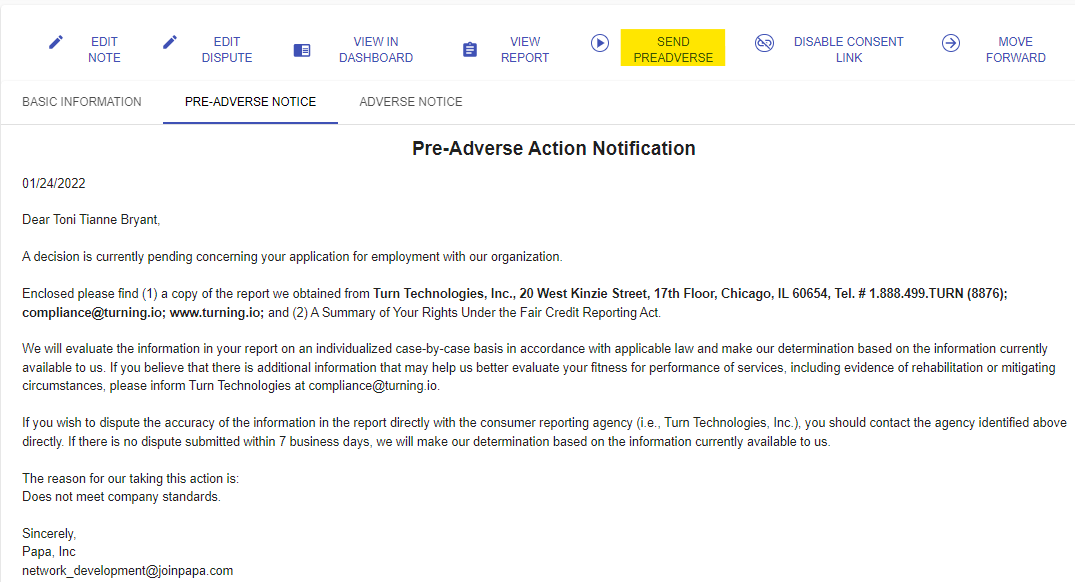
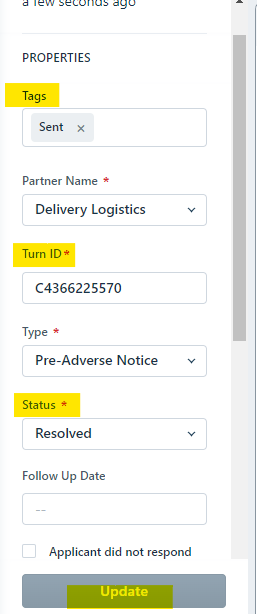
Back to the ticket in Freshdesk and fill the properties:
Tag: Sent
Turn Id:
Status: Resolved
Click on update to save the information.
Once the Pre Adverse Action letter was sent a new ticket will be created.
Search the Adverse Action Notice ticket in Freshdesk and open it.
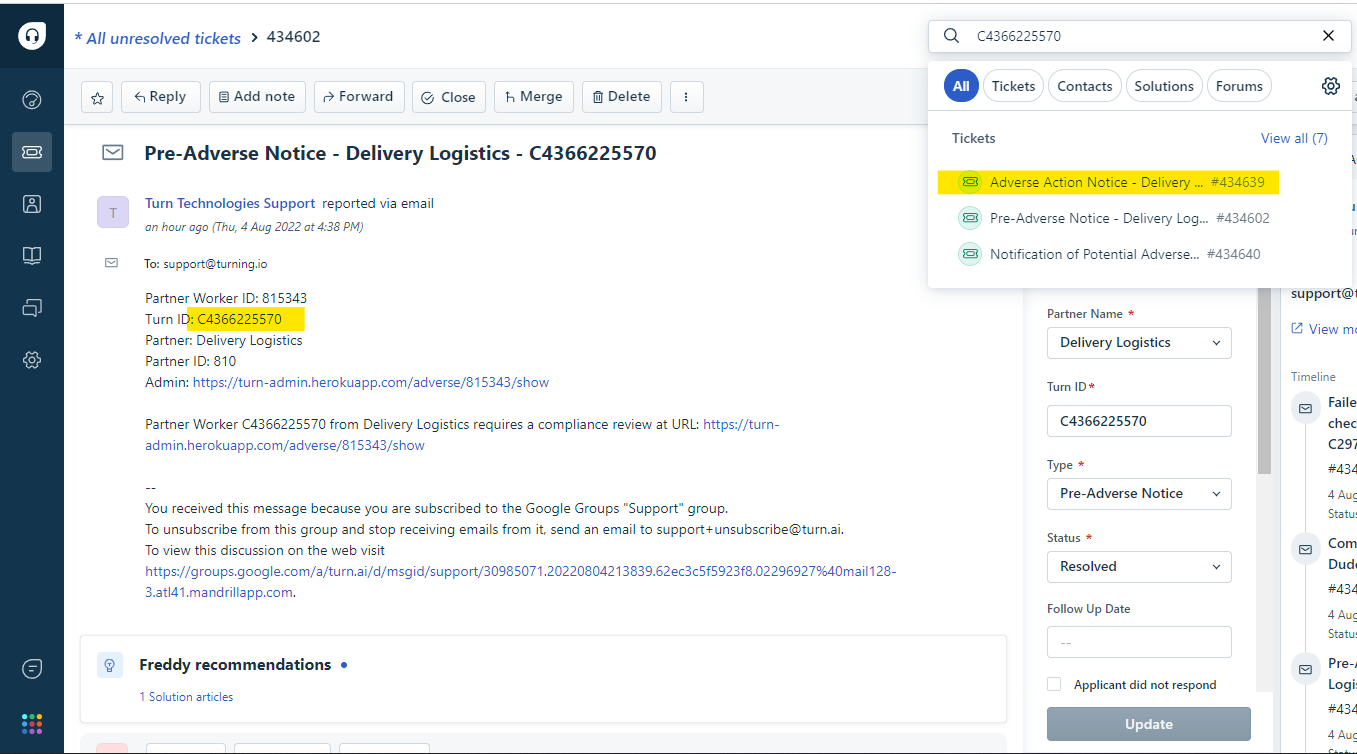
The Adverse Action Notice Ticket will look like this:
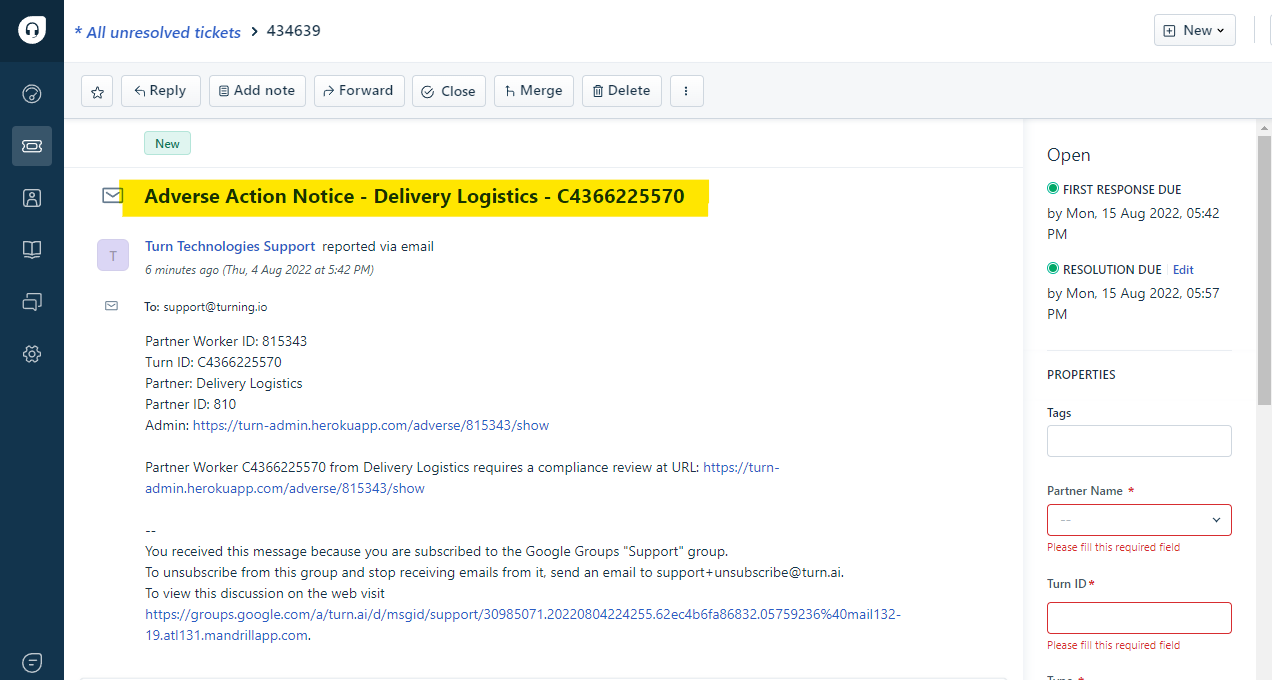
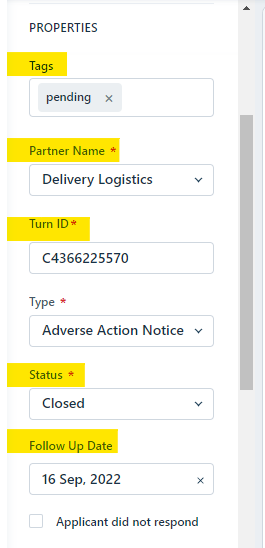
Fill the properties as follow:
Tag: Pending / LA (Los Angeles) or NYC
Partner Name
Turn ID
Status: Closed
Follow up Date
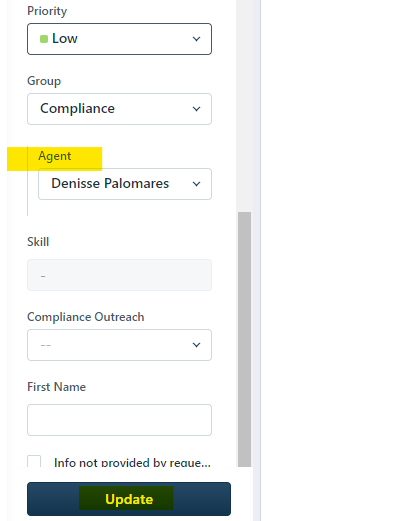
Agent
Click update for save the information.
Was this article helpful?
That’s Great!
Thank you for your feedback
Sorry! We couldn't be helpful
Thank you for your feedback
Feedback sent
We appreciate your effort and will try to fix the article