Tools Needed
Freshdesk, Turn Admin
Pre Adverse Action (PAA)
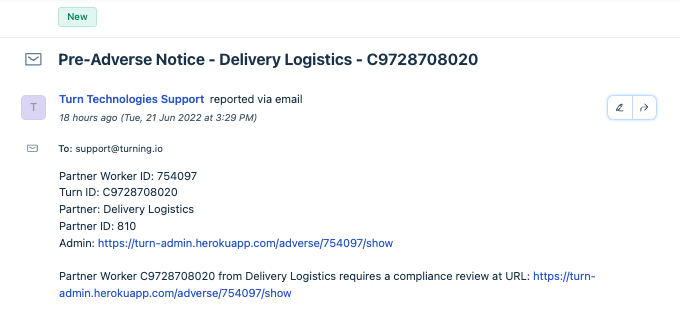
The Ticket
A ticket is created with the subject line:
Pre-Adverse Notice - [PARTNER NAME] - [TURN ID]
Casework
If you are assigned to work these cases, please follow these steps:
Step 1: Locate the applicant in Turn Admin Adverse
- Click the Admin link that is included in the ticket.
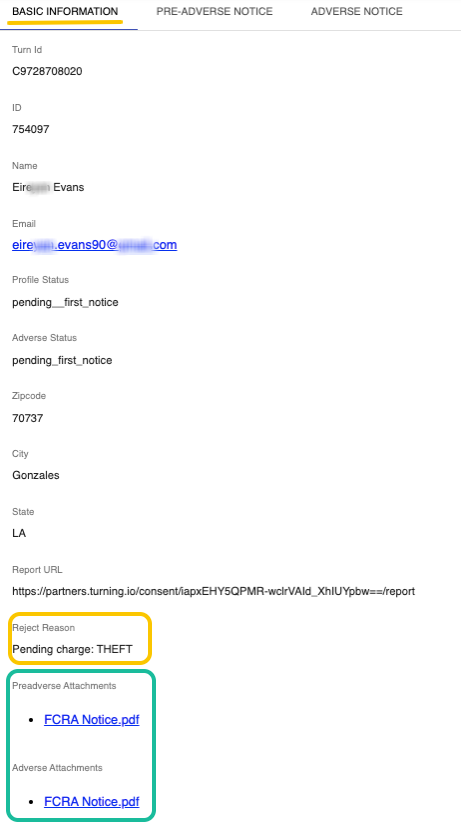
Step 2: Review the "Basic Information" tab
- Review and verify that all information shown is correct and that the Pre Adverse attachments are accurate and present.
- Confirm that the Profile Status and Adverse Status are the same.
- Confirm that the Rejected Reason is correct and that it does not contain special characters or hypens.
Step 3: Review the "Pre Adverse Notice" tab.
- Verify that the information is correct including the reason for taking the action.
- If the Rejected Reason is not correct, click on "Edit Note."
- For Rinse: The rejected reason can be obtained directly from the Partner Dashboard. Copy and paste this text.
- Click "Save."
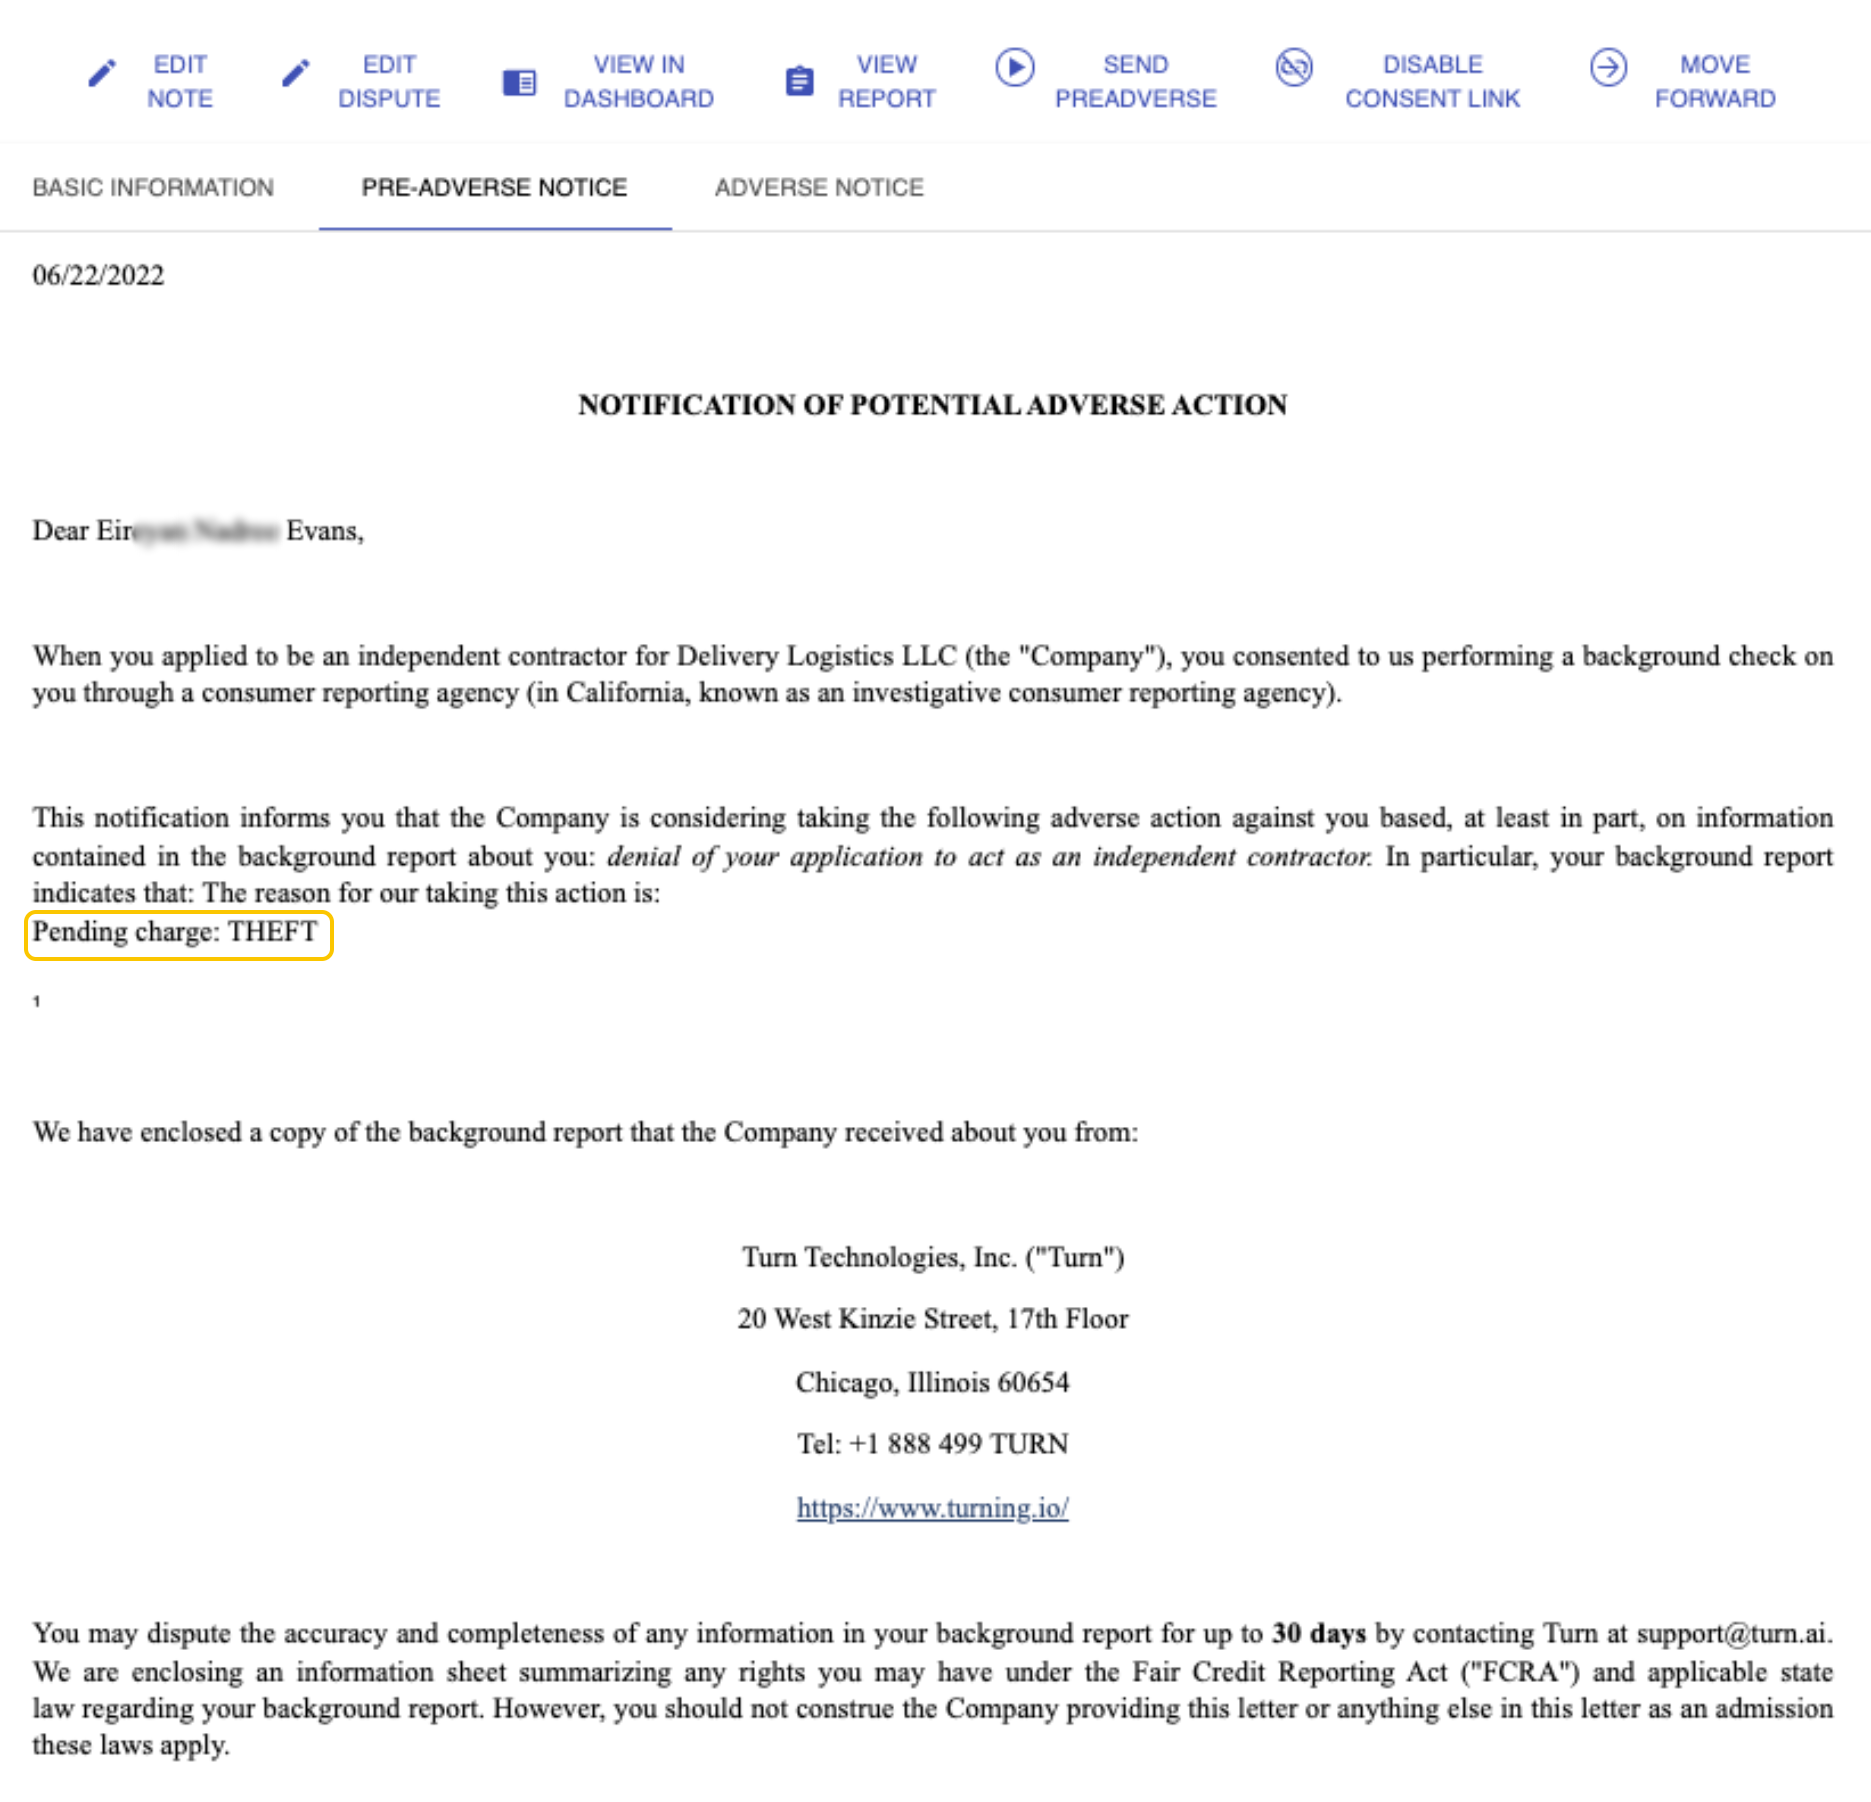
Step 4: Click "Send Pre Adverse"
Important: For PAA, it would be recommendable to check further details on the following KB Article: Pre-Adverse Action Process
Adverse Action (AA)
If the Applicant does not dispute the information contained in their background check within 7 business days* after the Pre Adverse Notice was sent, the Compliance Agent will send the Adverse Action letter.
*For Axlehire, we will wait 10 business days.
*Delivery Logistics and Delivery Dudes will not need an Adverse Action Letter. After 30 days, the ticket will reopen and we will reject the candidate.
Casework
If you are assigned to work these cases, please follow these steps:
Step 1: Confirm there are no pending disputes
- Search Freshdesk and the internal sheet.
- If a dispute was made, please mark the check in the applicant's profile.
- Click "Edit Dispute."
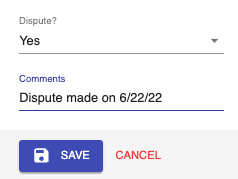
- Dispute? Select "Yes"
- Comments: Include the date that the dispute was sent (month/date/year).
- Click "Save."
- Click "Edit Dispute."
Step 2: Send the Adverse Action Letter
- Locate the applicant in Turn Admin Adverse.
- Review the Adverse Notice and confirm that the information is correct.
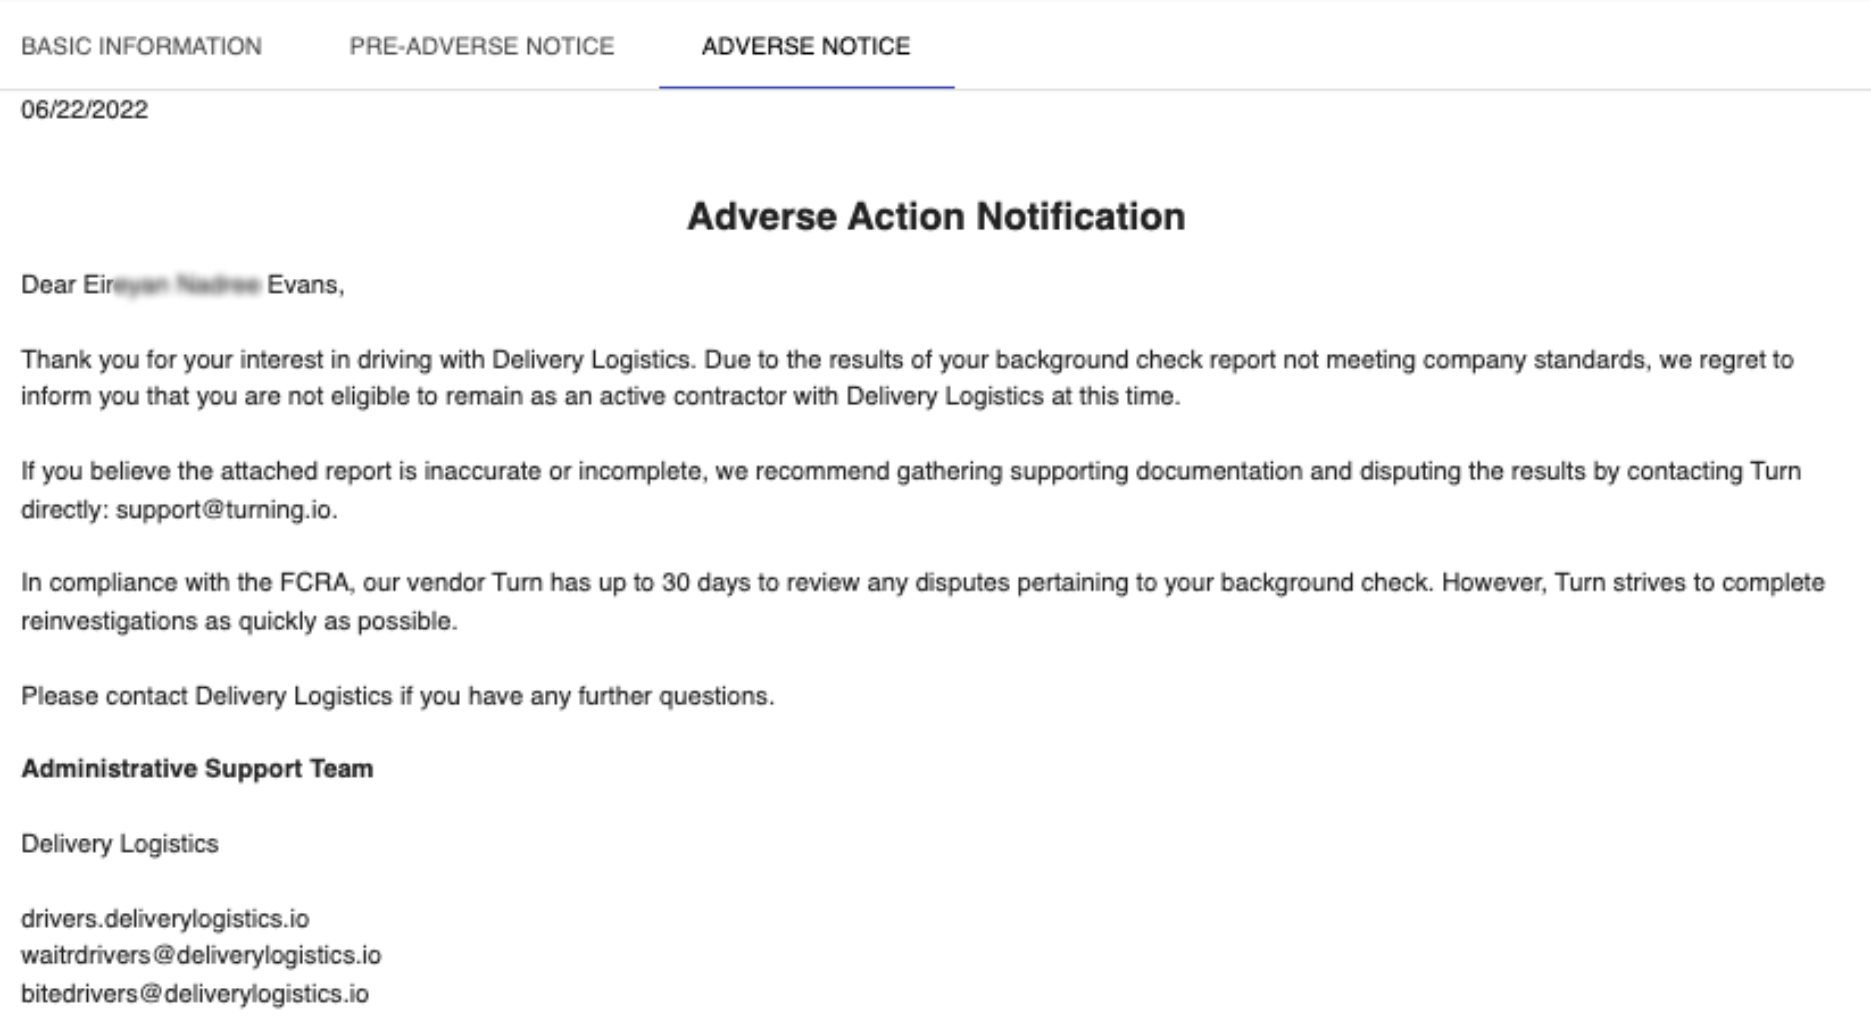
- Click Send Adverse
- The applicant's status will automatically changed to REJECTED.
- Return to the Partner Dashboard, refresh and confirm that the status was updated to REJECTED.
Exceptions & Reminders:
- Delivery Logistics & Delivery Dudes: A separate Adverse Action procedure is followed.
- The Pre Adverse Action and Adverse Action letters should never be sent if the applicant is in the dispute process.
- If the PAA letter is associated with a criminal record from Los Angeles or New York City, please notify Jimena.
- Before a letter is sent, we must always confirm that the status is the same in Profile Status and Adverse Status. If the status is not the same in both fields, the letter cannot be sent. We must review the profile status and that the Adverse Action profile contains the same city, zip and state as the profile.
Was this article helpful?
That’s Great!
Thank you for your feedback
Sorry! We couldn't be helpful
Thank you for your feedback
Feedback sent
We appreciate your effort and will try to fix the article